This year, E and I are hosting Thanksgiving for the first time ever! The thought of having a house full of family has been the kick in the pants I needed to complete all my projects I’ve put on the back burner. So, without further ado….
Pillows.
A few months ago, my sweet hubs bought me fabric to make new pillows. You can find that post here. I had made those pillows, but had no other pillows to match. Challenge accepted.

I bought some green and yellow chevron fabric at the wonderful Hob Lob and sewed four pillows out of it. The only problem was there was a slight miscommunication with my sister [perfect example of why you should always call and never rely on texting], and we bought WAY more fabric than we needed. So I had to get creative with all my extra fabric.
 We have lots of extra burlap table runners from our wedding still. I just paired it with some pumpkins and cut a simple table runner — no sewing required [my favorite]. Me and my sewing machine butt heads every time I use it.

I then used the rest of the fabric to put over plain old canvases and pinned pictures of our families up on them. I need to get some more pictures of our nieces and nephews, but my plan is to have them covered with their faces. I used both the extra yellow and green fabric, and then put them on a wall that has this sweet sign from Mary and Martha that says “this home is blessed by God’s sweet grace”. love it.
Dresser.
 our old TV stand. Yawn. Boring. And notice those cords poking through the back!? Hate it.

E and I picked up this dresser on the side of the road for FREE. I couldn’t pass it up. I’ve seen all these projects on Pinterest about making dressers into entertainment centers, so I gave it a shot. After all, it was FREE!

The first step was to take all the drawers out [most were broken anyways], and sand that baby down. E did this for me.
 Then it was time to paint. I chose a yellow without even comparing it to my yellow in my living room, but it turned out pretty well! Now here’s the tricky part…all the drawers but two were broken. We had to lay down a board in the middle and a board in the back to cover up all the wires and cords.
 We bought some plain old plywood to cover the back and for the two shelves. Don’t worry — I painted the other side of it. We just measured the dresser and cut the plywood accordingly. Super thankful for husbands who handle power tools so I don’t have to :)
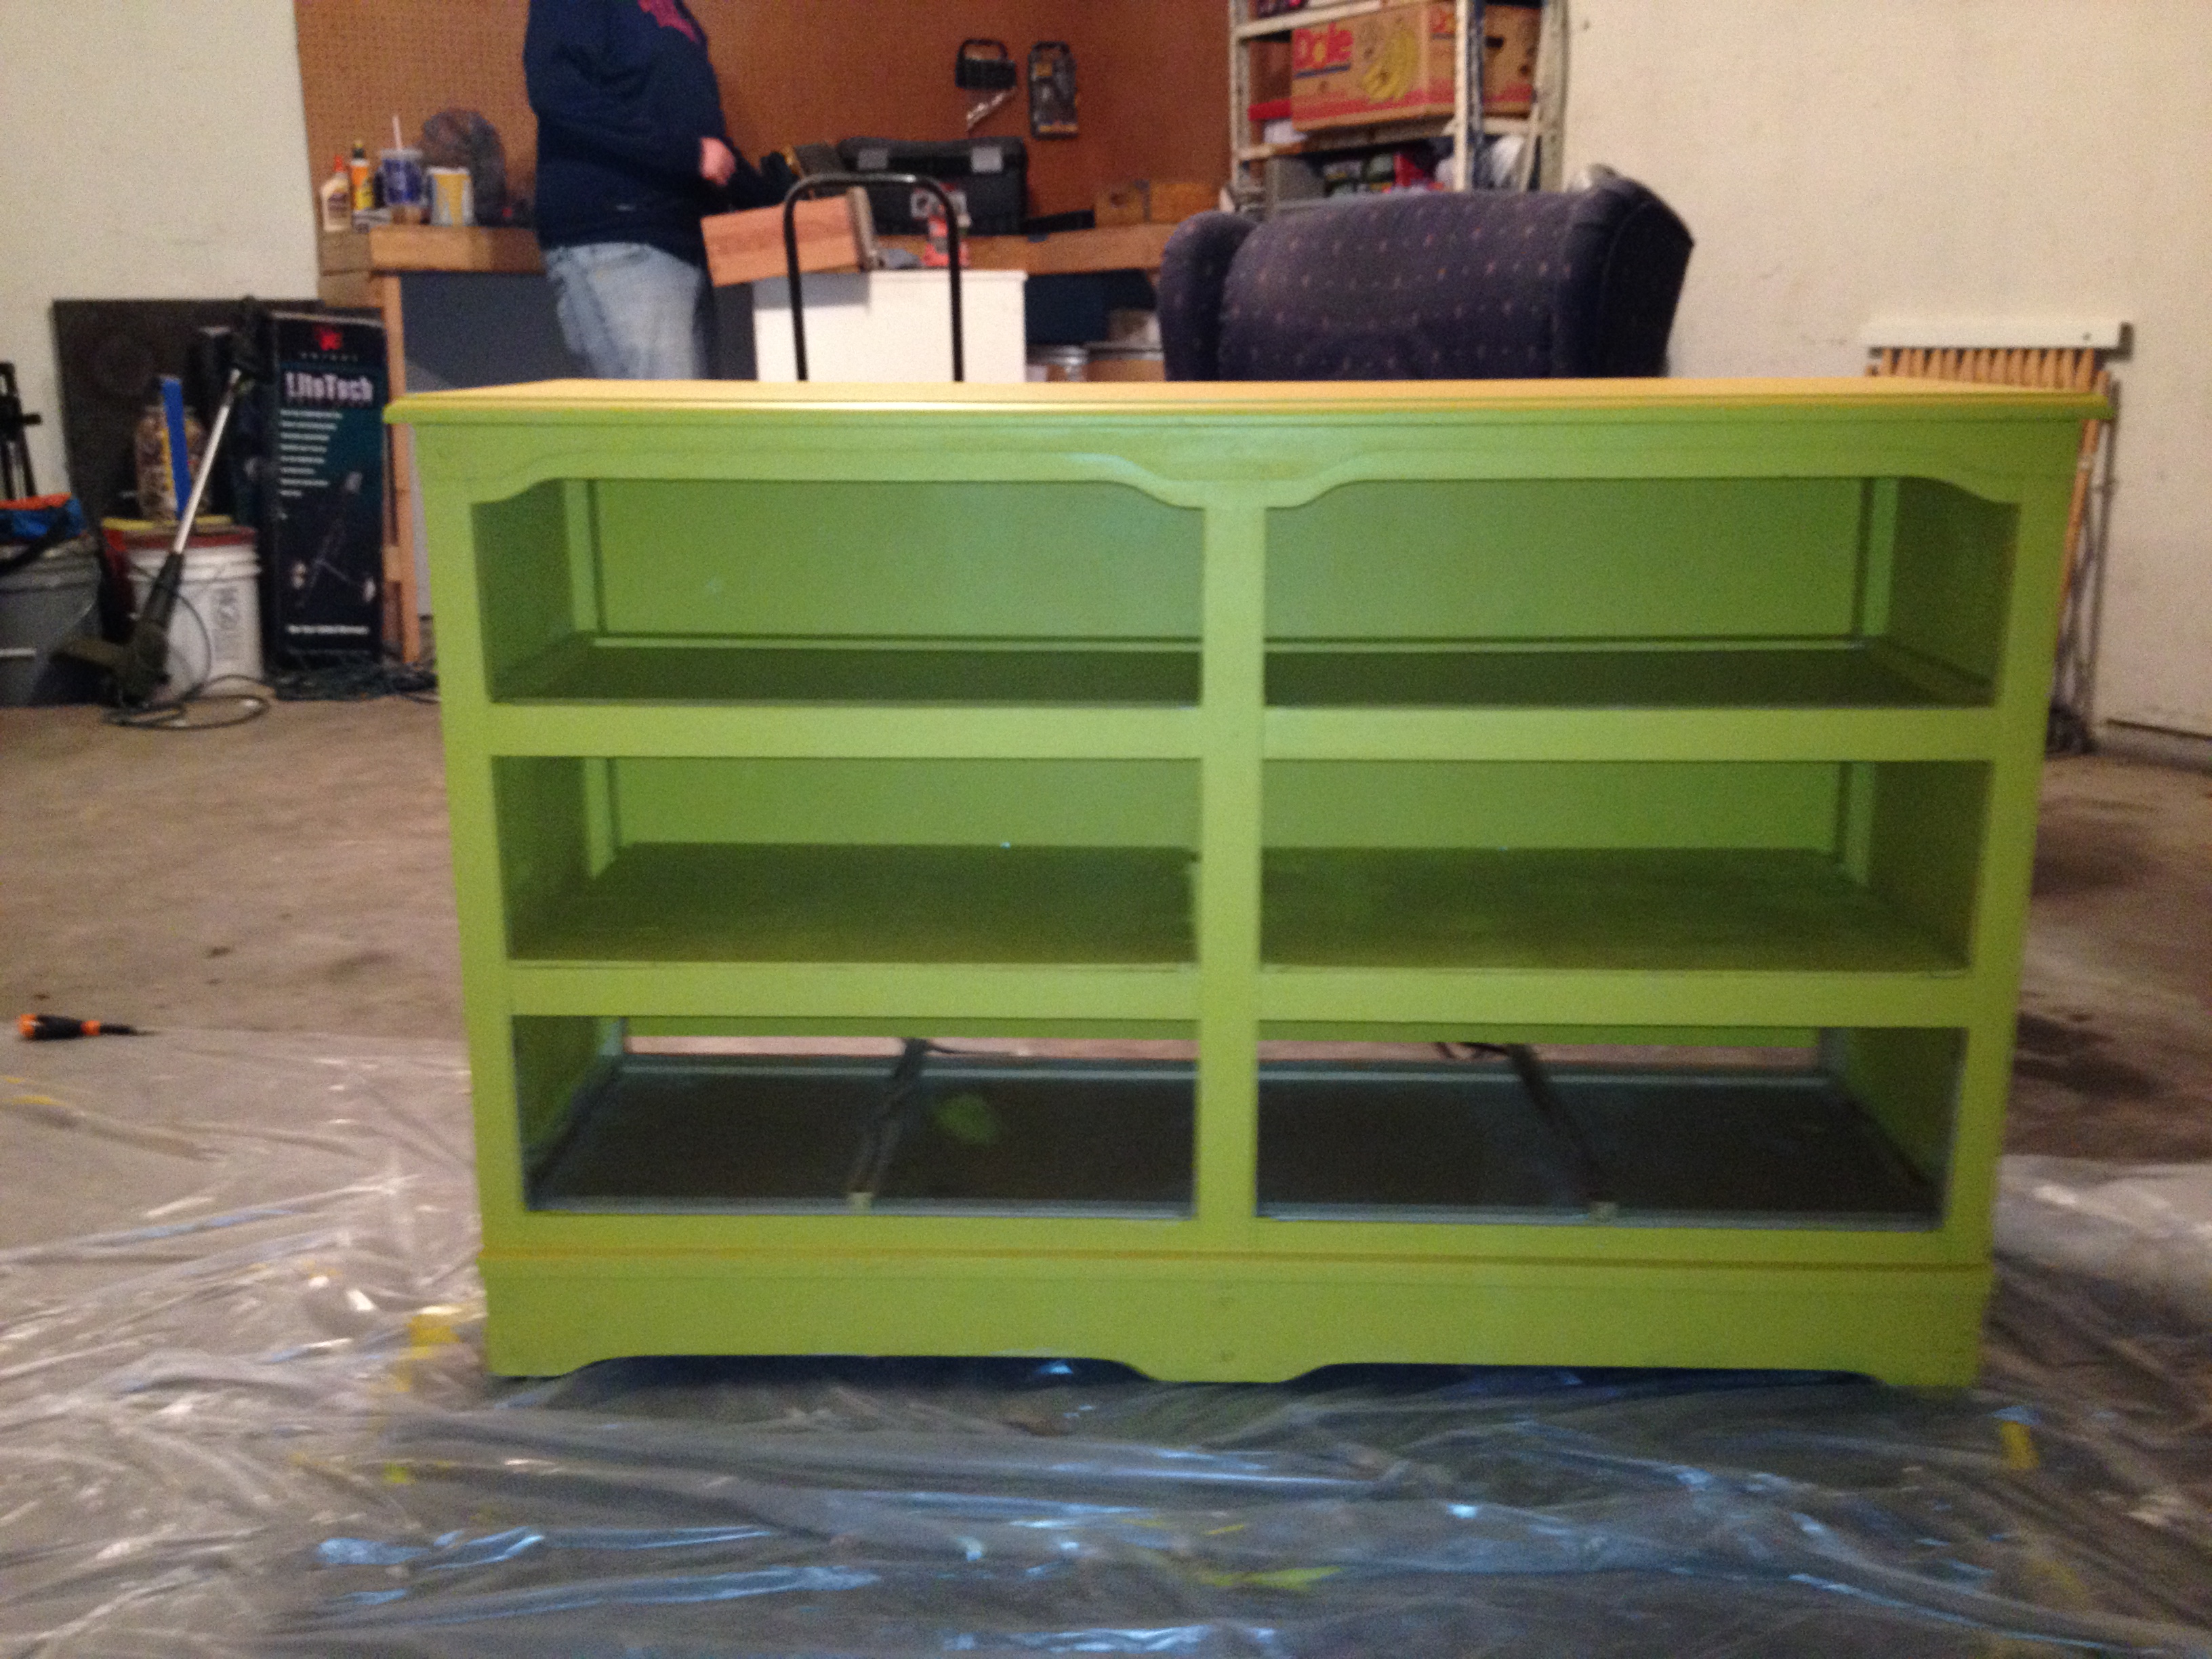 Here’s with the plywood nailed onto the back and with the middle shelf nailed in. E also drilled a hole in the back for the cords, but I forgot to get a picture of that.

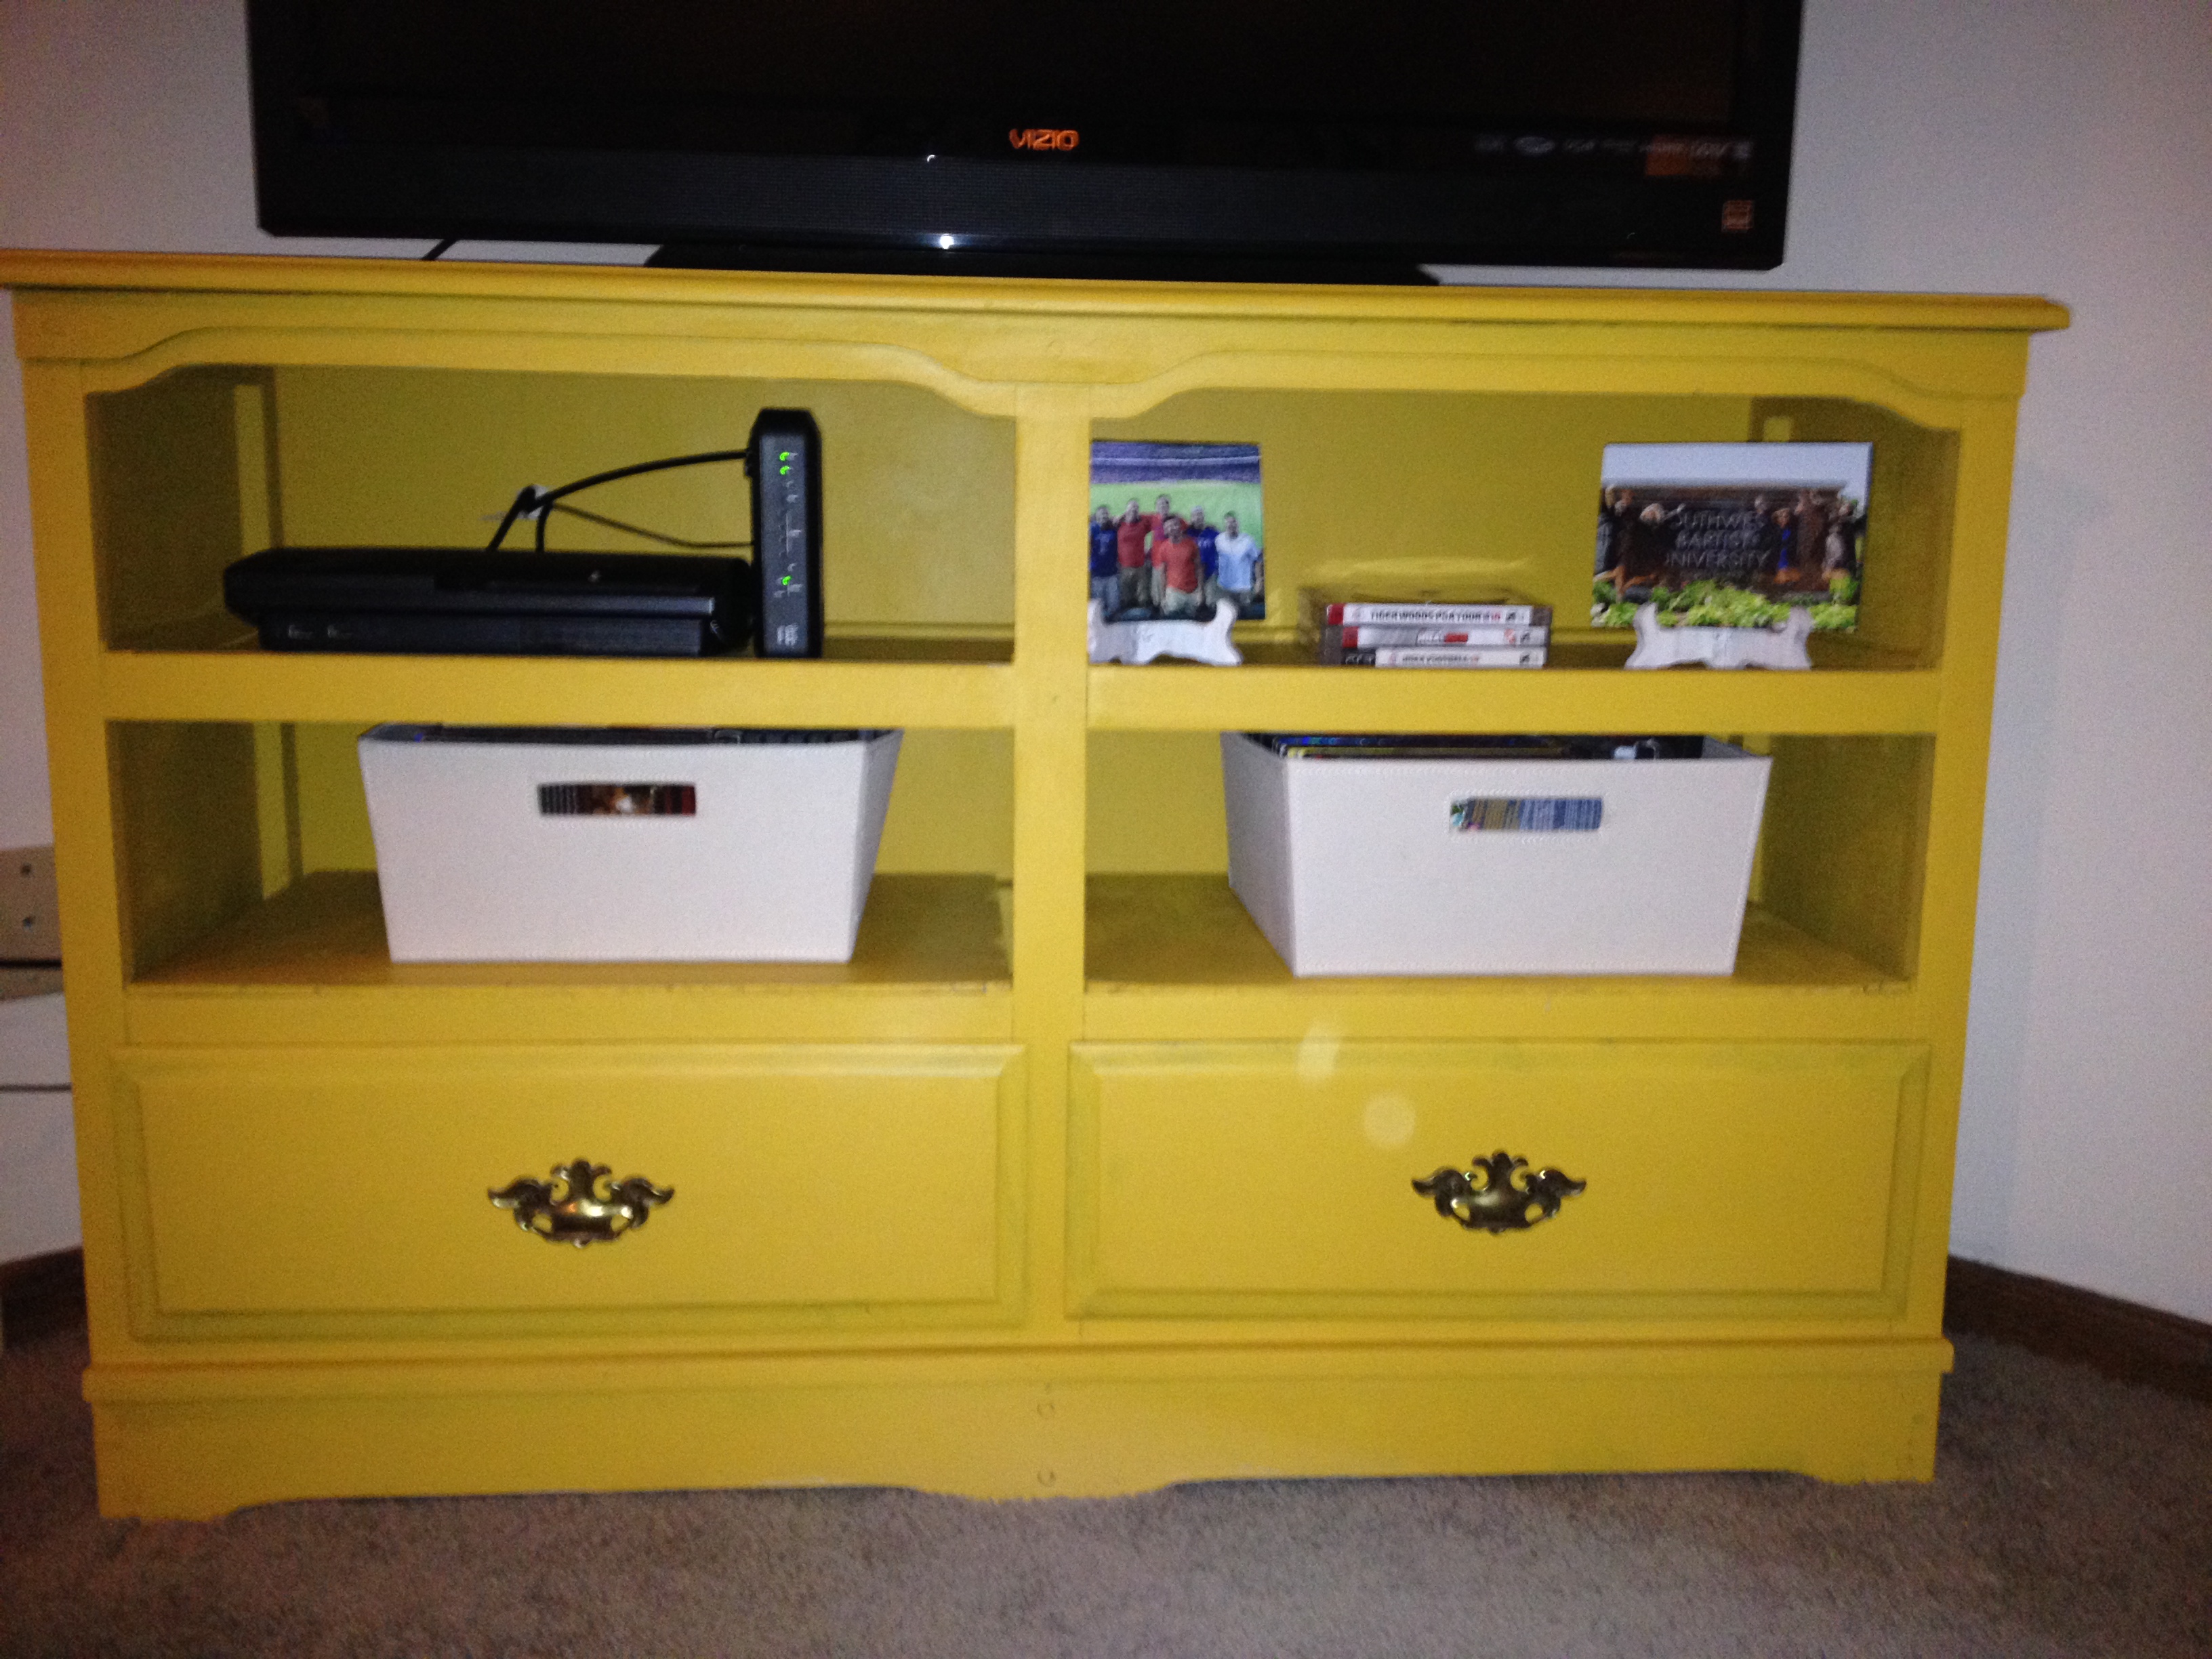
Look at that beauty! I love it already. It brings some color to our living room, the TV is up higher than before, AND LOOK, NO CORDS!!!!
Super easy projects too — this dresser took me a weekend to complete, and the pillows take about an hour each [but I’m super slow]. I normally do those while watching some Breaking Bad with the hubs.
Next stop: our bedroom! I’ve been putting that one off for months… Silly me :)
